Expanding your Mac’s storage doesn’t have to be an expensive endeavor. By assembling your own external SSD, you can achieve high-speed performance at a fraction of the cost of purchasing pre-built solutions. This guide will walk you through the process, from selecting the right components to understanding the technical considerations involved.
Understanding SSDs and Enclosures
An external SSD comprises two main components: the SSD itself and the enclosure that houses it. The SSD is the storage device where your data resides, while the enclosure provides the interface between the SSD and your Mac.
Choosing the Right SSD
When selecting an SSD, consider the following factors:
– Form Factor: M.2 SSDs are compact and commonly used for DIY external drives.
– Interface: NVMe (Non-Volatile Memory Express) SSDs offer faster speeds compared to SATA SSDs.
– Capacity: Assess your storage needs to determine the appropriate capacity, keeping in mind that higher capacities offer more space but come at a higher cost.
Selecting an Enclosure
The enclosure not only protects the SSD but also determines the connection type and, consequently, the data transfer speeds. Key considerations include:
– Connection Interface: USB-C 3.2 enclosures are widely available and affordable, offering speeds up to 10 Gbps. However, for faster performance, consider Thunderbolt or USB 4 enclosures, which can provide up to 40 Gbps.
– Build Quality: Look for enclosures with good heat dissipation properties, such as those made from aluminum, to ensure the SSD operates within optimal temperature ranges.
– Ease of Assembly: Tool-free enclosures simplify the installation process, making it accessible even for those with minimal technical experience.
Assembly Process
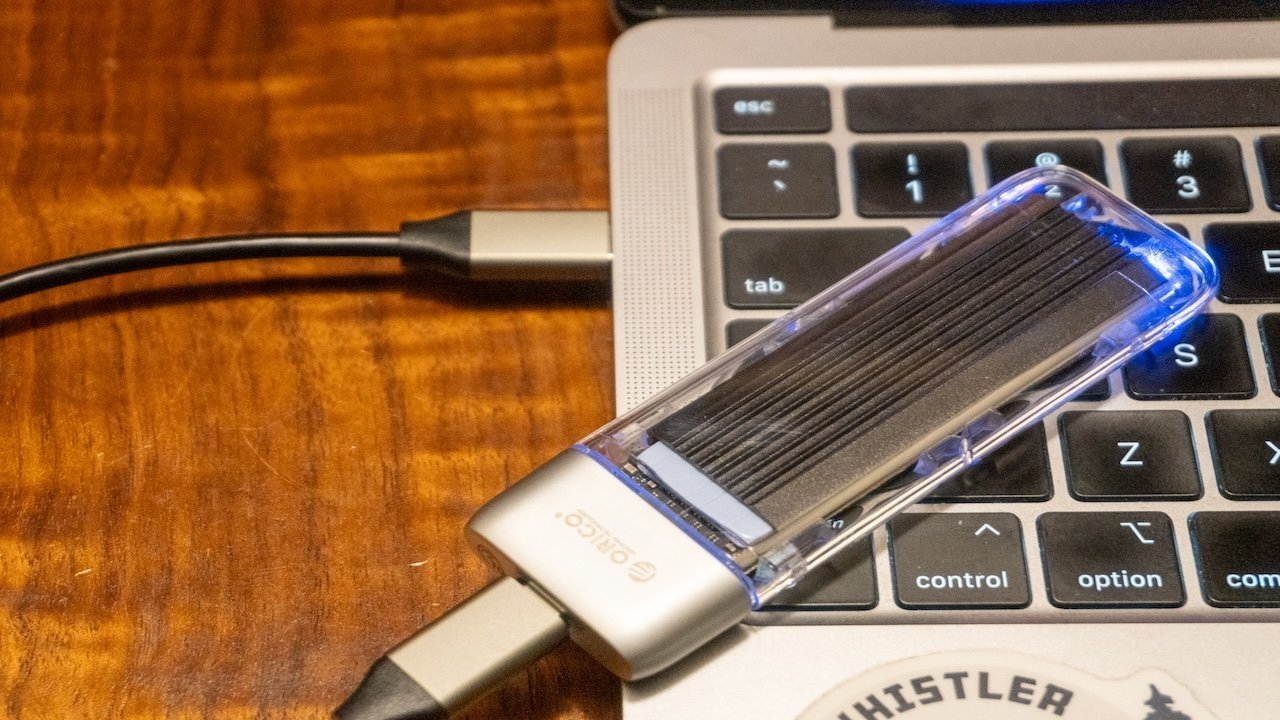
Assembling your external SSD is straightforward:
1. Insert the SSD into the Enclosure: Align the SSD with the connector inside the enclosure and gently insert it.
2. Secure the SSD: Depending on the enclosure design, you may need to secure the SSD with a screw or latch.
3. Close the Enclosure: Ensure the enclosure is properly closed to protect the SSD.
4. Connect to Your Mac: Use the appropriate cable to connect the enclosure to your Mac.
5. Format the SSD: Upon first connection, your Mac may prompt you to format the SSD. Use Disk Utility to format it to the desired file system, typically APFS for macOS.
Performance Considerations
The performance of your external SSD depends on several factors:
– SSD Speed: NVMe SSDs generally offer faster read/write speeds compared to SATA SSDs.
– Connection Interface: Thunderbolt and USB 4 connections provide higher bandwidth, allowing you to fully utilize the SSD’s speed capabilities.
– Enclosure Chipset: The controller chip inside the enclosure affects data transfer speeds. Opt for enclosures with reputable chipsets to ensure reliable performance.
Cost Savings
Building your own external SSD can be significantly more cost-effective than purchasing pre-assembled options. For example, assembling a 1TB external SSD using a quality NVMe drive and a USB-C 3.2 enclosure can cost around $150, whereas pre-built solutions with similar specifications may cost upwards of $200.
Conclusion
Creating your own external SSD is a practical and economical way to expand your Mac’s storage. By carefully selecting compatible components and following the assembly steps, you can achieve high-speed, reliable storage tailored to your needs.