Upgrade Your M4 Mac Mini’s SSD: A Comprehensive Guide to Enhancing Storage Capacity
The M4 Mac Mini has introduced a notable shift in Apple’s design philosophy by incorporating a modular SSD, allowing users to upgrade their storage post-purchase. This guide provides a detailed walkthrough on upgrading your M4 Mac Mini’s SSD, including necessary tools, step-by-step instructions, and considerations to ensure a successful enhancement.
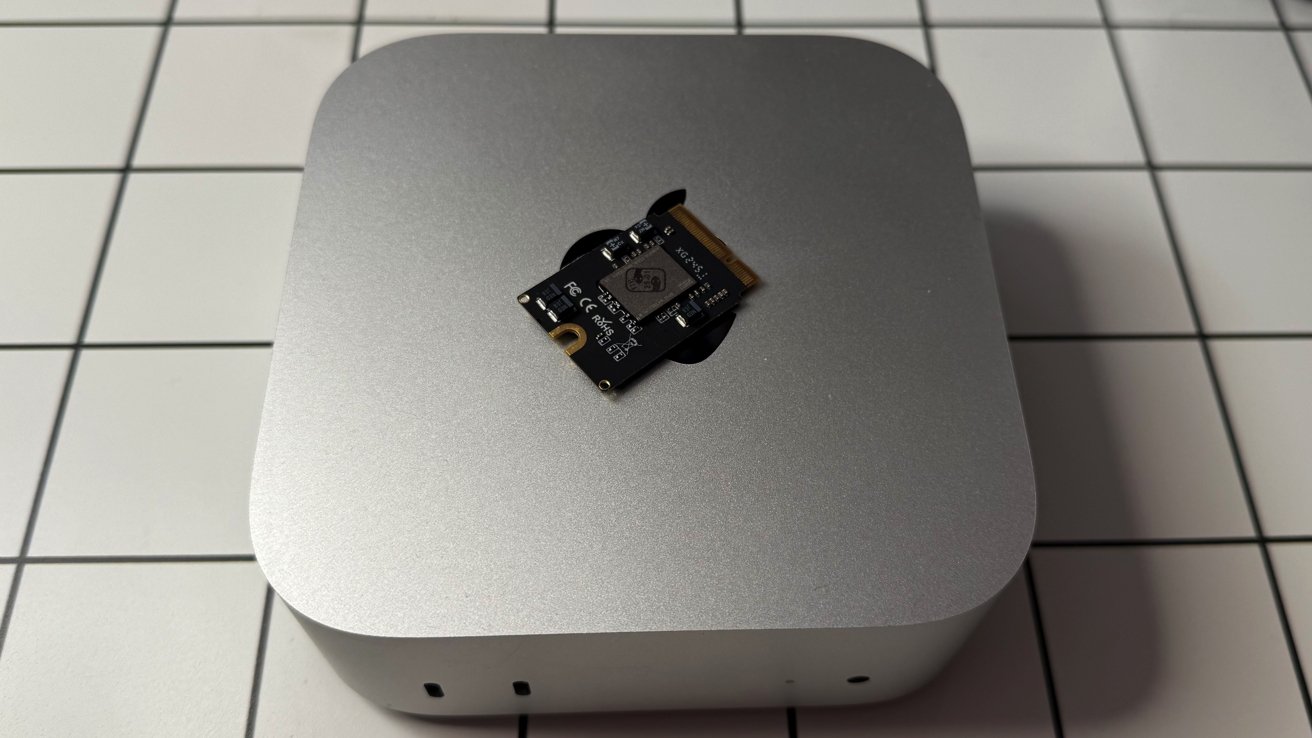
Understanding the M4 Mac Mini’s SSD Architecture
Historically, Apple’s Mac Mini models have varied in terms of upgradeability. The 2012 versions allowed both RAM and storage upgrades, while subsequent models saw these components soldered onto the motherboard, limiting user modifications. The M4 Mac Mini marks a departure from this trend by featuring a removable SSD module, offering users the flexibility to expand storage capacity as needed.
Pre-Upgrade Considerations
Before proceeding with the SSD upgrade, it’s essential to consider the following:
1. Warranty Implications: Modifying internal components may void Apple’s warranty. It’s advisable to consult Apple’s warranty terms or seek professional assistance if uncertain.
2. Data Backup: Ensure all important data is backed up to an external drive or cloud service to prevent potential data loss during the upgrade process.
3. Compatibility: Verify that the SSD module is compatible with the M4 Mac Mini. Notably, the M4 Pro models have different physical characteristics, and current third-party SSD modules are primarily designed for the standard M4 Mac Mini.
Tools and Materials Required
To perform the SSD upgrade, gather the following tools and materials:
– Compatible SSD Module: For instance, Expand Mac Mini offers a 2TB SSD expansion module specifically designed for the M4 Mac Mini.
– Precision Screwdriver Set: To safely remove and secure screws during the disassembly and reassembly process.
– Plastic Spudger or Pry Tool: To gently separate components without causing damage.
– Anti-Static Wrist Strap: To prevent static electricity from damaging internal components.
Step-by-Step Upgrade Process
1. Power Down and Unplug: Shut down the Mac Mini and disconnect all cables, including the power cord.
2. Access the Internal Components:
– Place the Mac Mini upside down on a soft, static-free surface.
– Use the plastic spudger to carefully remove the circular base plate, exposing the internal components.
3. Locate and Remove the Existing SSD:
– Identify the SSD module, typically secured with screws.
– Use the precision screwdriver to remove the screws and gently detach the SSD from its slot.
4. Install the New SSD Module:
– Align the new SSD module with the slot, ensuring proper orientation.
– Insert the SSD firmly into the slot and secure it with the previously removed screws.
5. Reassemble the Mac Mini:
– Replace the base plate by aligning it correctly and pressing down until it snaps into place.
– Reconnect all cables and power on the Mac Mini.
Post-Upgrade Configuration
Upon successful installation of the new SSD, follow these steps to configure it:
1. Boot into macOS Recovery Mode:
– Turn on the Mac Mini and immediately press and hold the Command (⌘) and R keys until the Apple logo appears.
2. Format the New SSD:
– In the macOS Utilities window, select Disk Utility and click Continue.
– Choose the new SSD from the list of drives.
– Click Erase, select APFS as the format, and provide a name for the drive.
– Click Erase to format the SSD.
3. Reinstall macOS:
– Return to the macOS Utilities window and select Reinstall macOS.
– Follow the on-screen instructions to complete the installation on the new SSD.
Performance Expectations
Upgrading the SSD can lead to noticeable improvements in read and write speeds, especially when using high-quality SSD modules. Users have reported enhanced performance, with faster boot times and improved application responsiveness. However, actual performance gains may vary based on the specific SSD used and individual usage patterns.
Alternative Storage Expansion Options
If internal upgrades are not preferable, external storage solutions offer viable alternatives:
– External SSDs: High-speed external SSDs connected via Thunderbolt or USB-C ports provide additional storage without internal modifications.
– Network-Attached Storage (NAS): For users requiring extensive storage accessible across multiple devices, NAS systems offer scalable solutions.
Conclusion
Upgrading the SSD in your M4 Mac Mini is a feasible endeavor that can significantly enhance your device’s storage capacity and performance. By carefully following the outlined steps and considering the associated risks, you can successfully perform this upgrade. Always ensure compatibility of components and consider seeking professional assistance if uncertain about any part of the process.